Sometimes we say silly things. Sometimes
I we say things like, "My back splash is going to be so much easier to do than Heather's". After all, Heather used
all natural stone. I read about her epic adventure in back splashing. How bad could mine be? Bad. It turned out so well, though! Let us begin.
We start with a workspace. My kitchen floor was the best place to do this. I laid down a towel so that the hammer would have a place to drive into. If I had just tried to break the tiles on the floor, the floor would give resistance, pushing back against the hammer blow. The towel lets the force of the hammer continue down and down and through the tile.
*You may wonder how I know these things. Believe it or not, I actually did something similar with mirrors in high school for an art project.
Make sure to use a plastic bag to contain your pieces. Otherwise slivers and chips will fly everywhere. Porcelain tile doesn't shatter or anything, but you will get the occasional bit of shrapnel. You'll also have to change bags when the current one gets too many holes sliced into it. Yes, porcelain edges are very sharp...as we all found out.
Ready to strike! I generally hit in the center once and then hit each of the resulting pieces in the center as well.
Tadaa! A bin full of pieces! This was about two boxes of tiles, which turned out to be more than I needed, so we were actually able to return the third. Don't open anything unless you're certain you're going to use it. Oh, and for any one who is curious, we used tiles from a company called Castle Stone.
Ah, my kitchen walls, our blank slate. We taped off the areas where the back splash would end. This also kept the grout from getting where it didn't need to be.
This is my listello, the border for the back splash. Isn't it gorgeous? I love the colors!
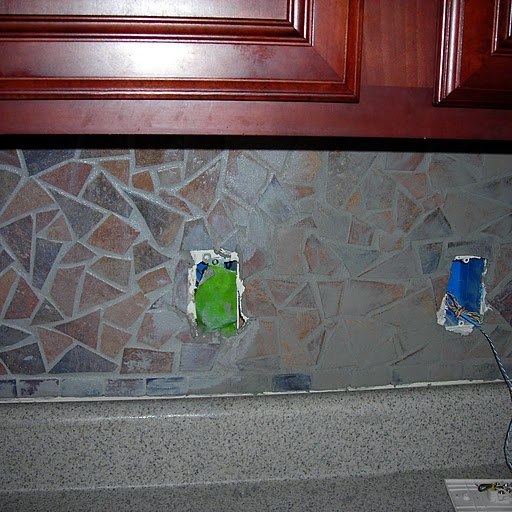
Here's the labor and the love part. The placement of all the broken tiles was done freehand. That means we had to search through all those countless pieces for something that would fit. It's actually really impressive that we finished as fast as we did. By "we" I mean "Heather and Mum". They really did about 90% of all the work while my husband was laid up with tooth pain and had to be taken on a fruitless trip to the ER.
If I didn't already know Heather and Mum loved me, this proved it. They were so patient and generous all weekend through all the unexpected difficulties. I am very thankful for both of them. :-)
Here's Heather mixing up the grout. She did me a great service by going out and getting a better grout color for. I had originally chosen a color called Pearl Grey, but that was really a bit too dark. Heather found (don't ask me how, it's a talent of hers) a different color called Smoke Grey, which was perfect!
Here's the grout all done. Didn't I tell you Heather found the perfect grout color? :-)
Here's the finished product, or as finished as it is so far. I have to caulk tonight, but it's all done otherwise. I hope you like!
Finally, if you ever have any back splashing questions, Heather is a great source for information. She knows what she's doing. Big, huge, endless thanks to these two great ladies in my life for everything this weekend. I love you both!


I was a *little* skeptical of the pre-grouted photos, but it looks great all filled in with the grey! Nice job, ladies!
ReplyDeleteWow! Ya'll did an awesome job!
ReplyDelete