
Warning!: Very picture-heavy post.
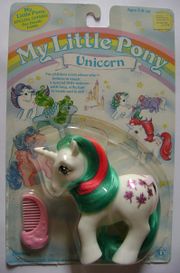
Who among you ladies out there didn't love My Little Pony? I don't know what it was, but those little ponies just enchanted us, didn't they? My sisters and I would always declare which pony we wanted to be. I honestly don't remember which one(s) Heather and Colie liked, but there was only ever one pony I liked best: Gusty.


In the cartoon, Gusty was the pony with attitude and spunk. I always thought she was just the coolest thing since sliced bread. This year for Halloween I decided to fulfill that childhood fantasy of mine and become Gusty.


Alright, I'm not gonna lie, this is a pretty involved costume. We are fulfilling a childhood fantasy, though, so I'm not about to do it halfway. Here's what I used to create my costume:
-White leggings
-White long sleeved turtleneck
-White swim cap
-1 yard of white felt
-1 yard of turquoise felt
-1 yard of hot pink felt
-Thin, white ribbon...lots of it.
-Sparkly purple paint. Fabric or acrylic is fine.
-Stencil brush
-Leaf stencils
-Scissors
-Tape measure
-Stick-on Velcro
-Hot glue gun and glue sticks
-False eyelashes (because the ponies always had great eyelashes!)

Okay, let's start with the most difficult part first. To make the hooves, I was thinking that I could just cut out a cone and wrap it around my arm. Somehow, that didn't work out so well, so I ended up cutting out a large rectangle and then trimmed the bits that stuck out. Mike had to help me mark the felt.


You can see I ended up with a sort of trapezoid shape. I then laid the original shape over the rest of the felt and outlined it with a pen. Then I cut out the other piece.


To do the hooves on my feet, we took some measurements of the length from my knee (where I wanted to hooves to start) to the floor as well as the circumference around my leg and around my foot plus some. I wanted the hooves to cover my feet after all. Then we used those to cut another rectangle, adding an inch or so extra just in case. Once the rectangle was cut, we trimmed the bits that stuck out just as before and copied it.

You can see how big one foot-hoof is here. After my initial mistake, I almost didn't have enough felt to do both, but Mike bust out his Tetris skills and made it work. :-)


Once the pieces were all cut out, it was time to attach the Velcro. I laid out the piece and lined all the edges up. Then I carefully began to stick on the Velcro around the edges. Once one side was down, we folded the piece over again to line up the edges again and then just folded the Velro-less edge back and stuck the Velcro on where it belonged.


Once everything was stuck on, I pressed down hard and then laid the newly created hoof underneath some heavy books. Good thing I've got a few (dozen) of those. :-)


Now that that's done, let's move onto the cute mark. Gusty's cute mark is a set of five purple leaves. I wanted to test my stencil before actually painting on my costume, so I used a piece of packaging that I had lying around. It was kind f like card stock, but not. Anyway, you can see how well my test turned out. Time to paint my costume.


I put another piece of packaging underneath my shirt so the paint wouldn't seep through. I also painted my leaves on the right side of my shirt 1) because the ponies had their cute marks on only one side and 2) I am wearing this to work, so I don't really want something on my butt. Anyway, look how well it turned out! I basically just loaded my stencil brush with paint and dabbed my little heart out until the stencil was completely filled in. Then I carefully peeled the stencil away and allowed about a half an hour between leaves to allow time to dry.


Painting the cute mark was probably the easiest part of my costume. Now for the part I'm most proud of, the tail! Okay, you have to understand that there are a few things that, for one reason or another, I think are really cool. Tails are one of them. Pointed ears are another., but I digress. I bought two yards of turquoise felt and cut the whole thing in half lengthwise. That entire piece of fabric went into my fabulous tail. I basically just started cutting wavy lengths of fabric all across the piece until I was out and laid them all together as I went. I left an inch or two of flat top on each length to make assembly easier. So far it's a pretty good looking tail, right?


With all the pieces cut out and stacked together, I took a great long length of ribbon (it went around my waist twice and then some) and and threaded it through slits I had cut into the flat-top ends of my felt. You can see I alternated between just one slit and two to add variation and volume. Then, once every piece was threaded, I tied the ribbon in a knot to hold all the pieces together.

Here's me testing out the tail. Yes, I'm still in my jammies, but I was SO excited about my tail when I saw the results. Just imagine me running up to the hubs and going, "Look at my tail! Look at my tail! Isn't it cute?" :-)

Okay, we're doing pretty well. Almost done, so what's up with the bear and the swim cap? Well, you see, the last part of the costume was the wig. I don't have a wig form, so my bear's butt did the job instead. I'd like to send out a special thank you to my mum who made me this bear ages ago in high school.


First we need our wig pieces. I took the rest of my turquoise felt, cut it in half lengthwise again, and cut out more wavy pieces. I did the same with my hot pink felt and laid everything out together as I went. I also made sure to cut some thinner pieces and some thicker pieces for variation. Now, you might be wondering why I chose felt instead of using synthetic hair or something. The reasons for this are 1) I want the costume to have a "cartoony" look to it and 2) I am not comfortable using those materials.

I also cut out little, white ears as well, using one as a template for the other. These will go on first for so the "hair" can cover them.

Here's my wig station. I have never made a wig before myself, but I was a theatrical scenic design major in college, so I've spent quite a bit of time in prop and costume making. The test piece for the leaf stencil was all dry by now, so I used it to set the glue gun's home. Glue guns are treacherous you know.


Like I said, the ears went on first. Aren't hey cute? I just put a line of hot glue on the ear and then pressed it down onto the right place on the swim cap. By putting the hair on afterward, the hair will help the ears stand up. You'll see.


Once the ears were on, I built a base of mostly turquoise hair with the pink just in front of the ears. See, I told you they'd stand up on their own. That's one of the things I like about felt, it's stiff enough of a material that it doesn't need much help to stand up properly. I cut the bangs later, as you will see, but my main concern here was getting the wig built. The details would come later. Pretty cool, huh?

This time I used a vase turned upside down to hold the wig because I needed some flexibility. I cut the bangs long and trimmed them up even further when I was actually wearing the thing.

One last detail. I know this picture is hard to see (my camera sucks), but that's Gusty's unicorn horn. I just took a triangle of felt, rolled it up and glued it to the bangs of the wig...after I burned myself trying to glue it to the swim cap. Not my proudest or brightest moment. I've had to wear my real hair in front of my face all week to hide the dime-sized circle of missing flesh in the center of my forehead. That's it, that's the whole costume.


Tadaa! I'm a My Little Pony! Now, I wore this to a costume party on Saturday a week ago, where it went over really well, so I have had some time to make alterations before I wear it to work for our costume contest. The hair on the wig has been trimmed further and I had to use white ribbon to keep the hooves on. I also bought a pair of white running shorts to wear over the leggings because I feel like they're a little too form-fitting for work. I am really hoping to win our costume contest, though. Just have to wait and see. What fun costumes are you and your little ones wearing today?
Happy Halloween, everyone!


No comments:
Post a Comment