Original Post from November 2012
Have you ever had a grand idea?
Has that grand idea not panned out? I have!
I had a wonderful idea that involved wood veneer! Then it didn't pan out.
So I was left with two packages of wood veneer that I didn't know what to do with. Enter the woven snowflakes from House Revivals!
Now I know I made these last year, but this year I'm revisiting them with some red oak wood veneer, iridescent taffeta and maybe some glitter, maybe not. Still haven't decided on that one.
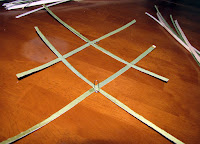
So anyways, if you pop on over to House Revivals you'll see that she does a wonderful job of detailing how to make these pretties. I followed her instructions after some prep work with the veneer.
I knew I had some left over taffeta and figured what could it hurt to try and iron the veneer to it. Well thank my lucky stars it worked.
I cut my pieces of veneer into about 12" long strips. Then I cut them all in half lengthwise, and then again and again. Each strip will garner 8 strips of wood and fabric.
Paper clips are your friends for this step. Also wood glue works better than white glue. It takes longer to dry, but you'll thank me. Trust me.
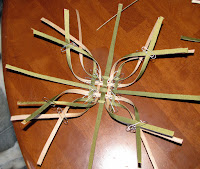
So here's the finished product. I haven't yet decided if I'm going to add some sparkle to the star, but I probably will. If only to hide some of the overlap. I love the effect though of the woven colors. Just think of all the possibilities, and you could even stain the wood.
I have since added rhinestones and pearls to these stars. They're also durable, which makes how pretty they are even better.


No comments:
Post a Comment