
Glittered Monogram Ornament
Heather
12/12/2011
1 Comments
I’m going to start by saying that my big guy is such a sweet sentimental guy. I don’t know what Hubs and I did to deserve such a sweetheart, but maybe we’re doing something right.
This year each kiddo has their own tree in their room, and my super sweet, sentimental guy wanted me to make him ornaments. He told me that he wanted everyone’s name on his tree. I asked him why and he said – Because we’re a family and I want all of you guys on my tree. *heart melts*

Well after playing around on Silhouette Studio and not being happy with any of my ideas for our names, I decided that I was going to simplify my life a bit. We’re going to go with our monograms inside a circle. What I ended up with, I think, is timeless. I really love these ornaments, and so does the big guy. Not to mention he now knows all of our middle names.
So I’ve created a tutorial with {a lot of} pictures to walk you guys just what I did to create these wonderful little works of art.
What you’re going to need:
Cardstock
Glue or a sticker machine like Xyron – 5” Creative Station
Glitter
Modge Podge
What I did:
I started in Silhouette Studio and a new document. Then with the type tool I typed out the first set of initials. I made sure they were all in caps to make my life easier. Then I picked a font. I ended up going with Calisto. Don’t know where I got it, but I’m going to hazard a guess that it was at dafont.com.

Next up is the circle shape tool. Hold down the shift key while you draw a circle somewhere on your page. When you’ve got about a 3” circle let go. Go to your resize screen and make your circle exactly 3” around.

Next we’re going to make an outside offset for our circle. In the offset screen make sure your offset is set to a 1/4” and hit apply. Now highlight both of your circles (making sure not to move one or the other) and right click and click make compound path.

Now back at your text, right click and ungroup your letters. Then drag the initial of the last name to the center of your circles.

While holding down Shift, click on the circle. Both your circles and the letter should now be highlighted. On the modify menu, go to align, and click on center-middle. This will center your letter inside the circles. This is about where I realized I was working with the wrong letter. Darn it. So I had to go back and fix it.

Now on just your letter, we want to start transforming it to fit inside our circle. With the letter highlighted, start pulling the top and bottom edges of the letter until they intersect the innermost circle. I also adjust the width of my letter so that it is just under 1” wide. Recenter your letter inside the circles by repeating the step from above.

Now grab one of your other letters and bring it to the circle. I started with the middle initial, which is why its going on the right side of the letter we just worked on. I just eyeballed where I thought the center of this letter was in the white space next to the right of the center. Now stretch this letter so that the top and bottom intersect the inner-most circle.

When positioning these side letters, I try to space them so that the bounding box of the letter is even with the center letter. That gives me enough of a margin between the letters, so that it doesn’t look crowded. Highlight the letter and the circles, go up to the object menu and click on align, this time click on middle. This should center your letter in the circle, without moving it on top of the letter we were just working on. Repeat for the last letter.

Now highlight all of the letters and the circles and weld them. I try to not have any of my letters extend past the outer circle, because it makes it easier to weld. Weld all of your shapes and letters.
*If your letters extend past the outer circle then instead of welding everything right now, you will click on subtract all. Then click on the individual shapes that are outside of the outer circle and delete them. Now highlight everything again and weld again. Sometimes after doing this you need to go in and adjust or delete some of the points, but not always.

Now we’re going to make another small circle to hold a ribbon or an ornament hanger. I did this on only two ornaments, because I got the first 3 done before I had my Eureka! moment. Click on the circle shape again, and while holding shift make about a 1/2” circle. Go back to the resize menu and resize the circle to 1/2”, if need be.

Now click on the offset window again, and this time click on internal offset. Keep reducing your offset circle until it is 1/4” big.

Highlight both small circles and right click. Click on the Make Compound Path.

Now move your circles to about top center of your monogram. I try to line up the outer edge of the ornament with the inner edge of the smaller circle. with everything highlighted click on the object menu and click on align. Now click center. This will horizontally center your smaller circle against the ornament.

Highlight everything and weld it all together.

Move your ornament to the top left corner of your paper. Make sure to stay within the cutting margins of your paper. Go to the Clone menu and click on the column of three. Now you should have three copies of your ornament.

Move one of the copies to the upper right corner, and move the last one below and centered the other two. This will maximize your leftover paper.

Following the instructions to cut out your ornaments. Remove the ornaments from the cutting mat, and toss the negative space. I would keep the larger paper though, because that bottom half could be used for something.

Now that you have 3 identical ornaments cut out its time to layer them together. This is where my Xyron comes in handy. At least it would if I hadn’t run out sticker stuff. Oh well, we’re going to do this last ornament old school. Bring out the glue stick! On the wrong side of your ornament apply glue everywhere, paying special attention to any small or dangling areas. Making sure to have your ornaments lined up correctly, glue two of the pieces together. Make sure everything is firmly adhered and lined up. Glue the remaining ornament on top of the two ornaments you just glued together. Your ornament now has some beef to it.


Time to paint some Modge Podge on this baby. I covered both sides of my ornament in Modge Podge. It was messy, but it got the job done. Immediately after I was done painting both sides of the ornament, I popped it into a bowl of German glass glitter and gently shook it around, unfortunately that was taking too long so I dumped some more glitter on top of my ornament. Then fish out the ornament, I used an ornament hanger, and hang to dry.

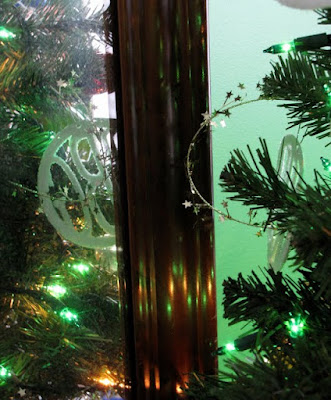
Then hang on tree and enjoy.


Wondering about the monogram I made in this tutorial? Its our friend who stays with us quite often. The boys think of him as part of the family, so when I was making these family ornaments, Dev was quite adamant that I found out Evan’s middle name and make him an ornament too. Such a sweetheart! Oh and its still drying.
Well I hope you guys have liked this little tutorial. I had a blast making these and they’re so very easy and personal. I may have to make up some more to decorate Christmas gifts with!
Have a great day ya’ll.
This year each kiddo has their own tree in their room, and my super sweet, sentimental guy wanted me to make him ornaments. He told me that he wanted everyone’s name on his tree. I asked him why and he said – Because we’re a family and I want all of you guys on my tree. *heart melts*

Well after playing around on Silhouette Studio and not being happy with any of my ideas for our names, I decided that I was going to simplify my life a bit. We’re going to go with our monograms inside a circle. What I ended up with, I think, is timeless. I really love these ornaments, and so does the big guy. Not to mention he now knows all of our middle names.
So I’ve created a tutorial with {a lot of} pictures to walk you guys just what I did to create these wonderful little works of art.
What you’re going to need:
Cardstock
Glue or a sticker machine like Xyron – 5” Creative Station
Glitter
Modge Podge
What I did:
I started in Silhouette Studio and a new document. Then with the type tool I typed out the first set of initials. I made sure they were all in caps to make my life easier. Then I picked a font. I ended up going with Calisto. Don’t know where I got it, but I’m going to hazard a guess that it was at dafont.com.
Next up is the circle shape tool. Hold down the shift key while you draw a circle somewhere on your page. When you’ve got about a 3” circle let go. Go to your resize screen and make your circle exactly 3” around.
Next we’re going to make an outside offset for our circle. In the offset screen make sure your offset is set to a 1/4” and hit apply. Now highlight both of your circles (making sure not to move one or the other) and right click and click make compound path.
Now back at your text, right click and ungroup your letters. Then drag the initial of the last name to the center of your circles.
While holding down Shift, click on the circle. Both your circles and the letter should now be highlighted. On the modify menu, go to align, and click on center-middle. This will center your letter inside the circles. This is about where I realized I was working with the wrong letter. Darn it. So I had to go back and fix it.

Now on just your letter, we want to start transforming it to fit inside our circle. With the letter highlighted, start pulling the top and bottom edges of the letter until they intersect the innermost circle. I also adjust the width of my letter so that it is just under 1” wide. Recenter your letter inside the circles by repeating the step from above.
Now grab one of your other letters and bring it to the circle. I started with the middle initial, which is why its going on the right side of the letter we just worked on. I just eyeballed where I thought the center of this letter was in the white space next to the right of the center. Now stretch this letter so that the top and bottom intersect the inner-most circle.
When positioning these side letters, I try to space them so that the bounding box of the letter is even with the center letter. That gives me enough of a margin between the letters, so that it doesn’t look crowded. Highlight the letter and the circles, go up to the object menu and click on align, this time click on middle. This should center your letter in the circle, without moving it on top of the letter we were just working on. Repeat for the last letter.
Now highlight all of the letters and the circles and weld them. I try to not have any of my letters extend past the outer circle, because it makes it easier to weld. Weld all of your shapes and letters.
*If your letters extend past the outer circle then instead of welding everything right now, you will click on subtract all. Then click on the individual shapes that are outside of the outer circle and delete them. Now highlight everything again and weld again. Sometimes after doing this you need to go in and adjust or delete some of the points, but not always.
Now we’re going to make another small circle to hold a ribbon or an ornament hanger. I did this on only two ornaments, because I got the first 3 done before I had my Eureka! moment. Click on the circle shape again, and while holding shift make about a 1/2” circle. Go back to the resize menu and resize the circle to 1/2”, if need be.
Now click on the offset window again, and this time click on internal offset. Keep reducing your offset circle until it is 1/4” big.
Highlight both small circles and right click. Click on the Make Compound Path.
Now move your circles to about top center of your monogram. I try to line up the outer edge of the ornament with the inner edge of the smaller circle. with everything highlighted click on the object menu and click on align. Now click center. This will horizontally center your smaller circle against the ornament.
Highlight everything and weld it all together.
Move your ornament to the top left corner of your paper. Make sure to stay within the cutting margins of your paper. Go to the Clone menu and click on the column of three. Now you should have three copies of your ornament.
Move one of the copies to the upper right corner, and move the last one below and centered the other two. This will maximize your leftover paper.
Following the instructions to cut out your ornaments. Remove the ornaments from the cutting mat, and toss the negative space. I would keep the larger paper though, because that bottom half could be used for something.

Now that you have 3 identical ornaments cut out its time to layer them together. This is where my Xyron comes in handy. At least it would if I hadn’t run out sticker stuff. Oh well, we’re going to do this last ornament old school. Bring out the glue stick! On the wrong side of your ornament apply glue everywhere, paying special attention to any small or dangling areas. Making sure to have your ornaments lined up correctly, glue two of the pieces together. Make sure everything is firmly adhered and lined up. Glue the remaining ornament on top of the two ornaments you just glued together. Your ornament now has some beef to it.


Time to paint some Modge Podge on this baby. I covered both sides of my ornament in Modge Podge. It was messy, but it got the job done. Immediately after I was done painting both sides of the ornament, I popped it into a bowl of German glass glitter and gently shook it around, unfortunately that was taking too long so I dumped some more glitter on top of my ornament. Then fish out the ornament, I used an ornament hanger, and hang to dry.

Then hang on tree and enjoy.


Wondering about the monogram I made in this tutorial? Its our friend who stays with us quite often. The boys think of him as part of the family, so when I was making these family ornaments, Dev was quite adamant that I found out Evan’s middle name and make him an ornament too. Such a sweetheart! Oh and its still drying.
Well I hope you guys have liked this little tutorial. I had a blast making these and they’re so very easy and personal. I may have to make up some more to decorate Christmas gifts with!
Have a great day ya’ll.


