Follow Us @SewHalfCrazy

7/24/2010

Late Lemon Dip

7/24/2010 2 Comments
Updated with pictures!

Kind of...

I have a confession. Unless something is written down in front of me, I will forget to do it. I live off of my planner at work and my calendar reminders here at home. Guess what weekly event is not written down? Yup, my weekly blog entry (and, if anyone reading follows my own blog, that hasn't been updated recently because I am stuck in a revamp). I have now set up a calendar reminder for myself, so please accept my sincerest apologies for forgetting this week. On to the show!


This past week, Mike and I were invited over to our friend Jeff's house for dinner because he just moved into a brand, new house. Very nice. Well, we were asked to bring dessert. Mike had some crazy idea that we would just pick something up from the store on the way. Right. This was the perfect opportunity to break out a new recipe I'd been wanting to try.

Lemon Fruit Dip

1 cup cold milk
1 pkg (3.4 oz) instant lemon pudding mix
1 cup (8 oz) sour cream
Assorted fresh fruit

In a small bowl, whisk milk and pudding mix for 2 minutes. Let stand for 2 minutes or until soft-set. Whisk in sour cream. Chill until serving. Serve with fruit. Yield: 1-2/3 cups.

Super easy and super yummy! This dip is as refreshing as a cool glass of lemonade, which is great because we were grilling out on this particular night. Easy as it is, though, I still managed to mess it up...just a little. Remember that thing where I don't always read/check the directions as well as I should? Yeah, that happened again here. I added two cups of milk instead of one, even after Mike asked me if I was sure that was right. "Of course it's right; I checked!" I insisted rather indignantly. Two minutes later, "Oops." Well, it didn't hurt anything, thankfully, and the recipe still turned out so well that Jeff wanted to keep the leftovers for later. This is a perfect summer treat and takes all of five minutes to make. Hope you enjoy!

7/23/2010

Brrrp...Brrrp....

7/23/2010 2 Comments
I am interrupting the regularly scheduled Friday Food Frenzy with this important service announcement.

The awesome Quite Red has been seen out and about in a subterranean lair in Gainesville. Citizens should remain calm and check back on Monday to see the outcome of this amazing site.

The picture above was captured by a fearless homeowner who dared to get close to the unique site. Unfortunately, he was only able to capture the entrance to Red's home. Still you can see the residue that this creature leaves.

Your regularly scheduled program will return in a moment.

Heather

7/22/2010

Braided Jute Shower Rings

7/22/2010 1 Comments
Have you ever tried finding the perfect item for a makeover and not been able to find it? It happens to me all the time, but more often than not being able to find it is not wanting to pay the outlandish price that  they want me to pay. Not gonna happen. I am married to the {cheapest} funniest man alive. His spendthrift-iness has rubbed off on me. So when I couldn't find the perfect shower rings I decided that I could make some. Of course, after I decided this and then went and bought some $1 store shower rings I found tons of shower rings that were perfect.

So this is a super simple project and being as the only thing I had to buy was $1...it may also go down as one of the cheapest. :) On to the show!

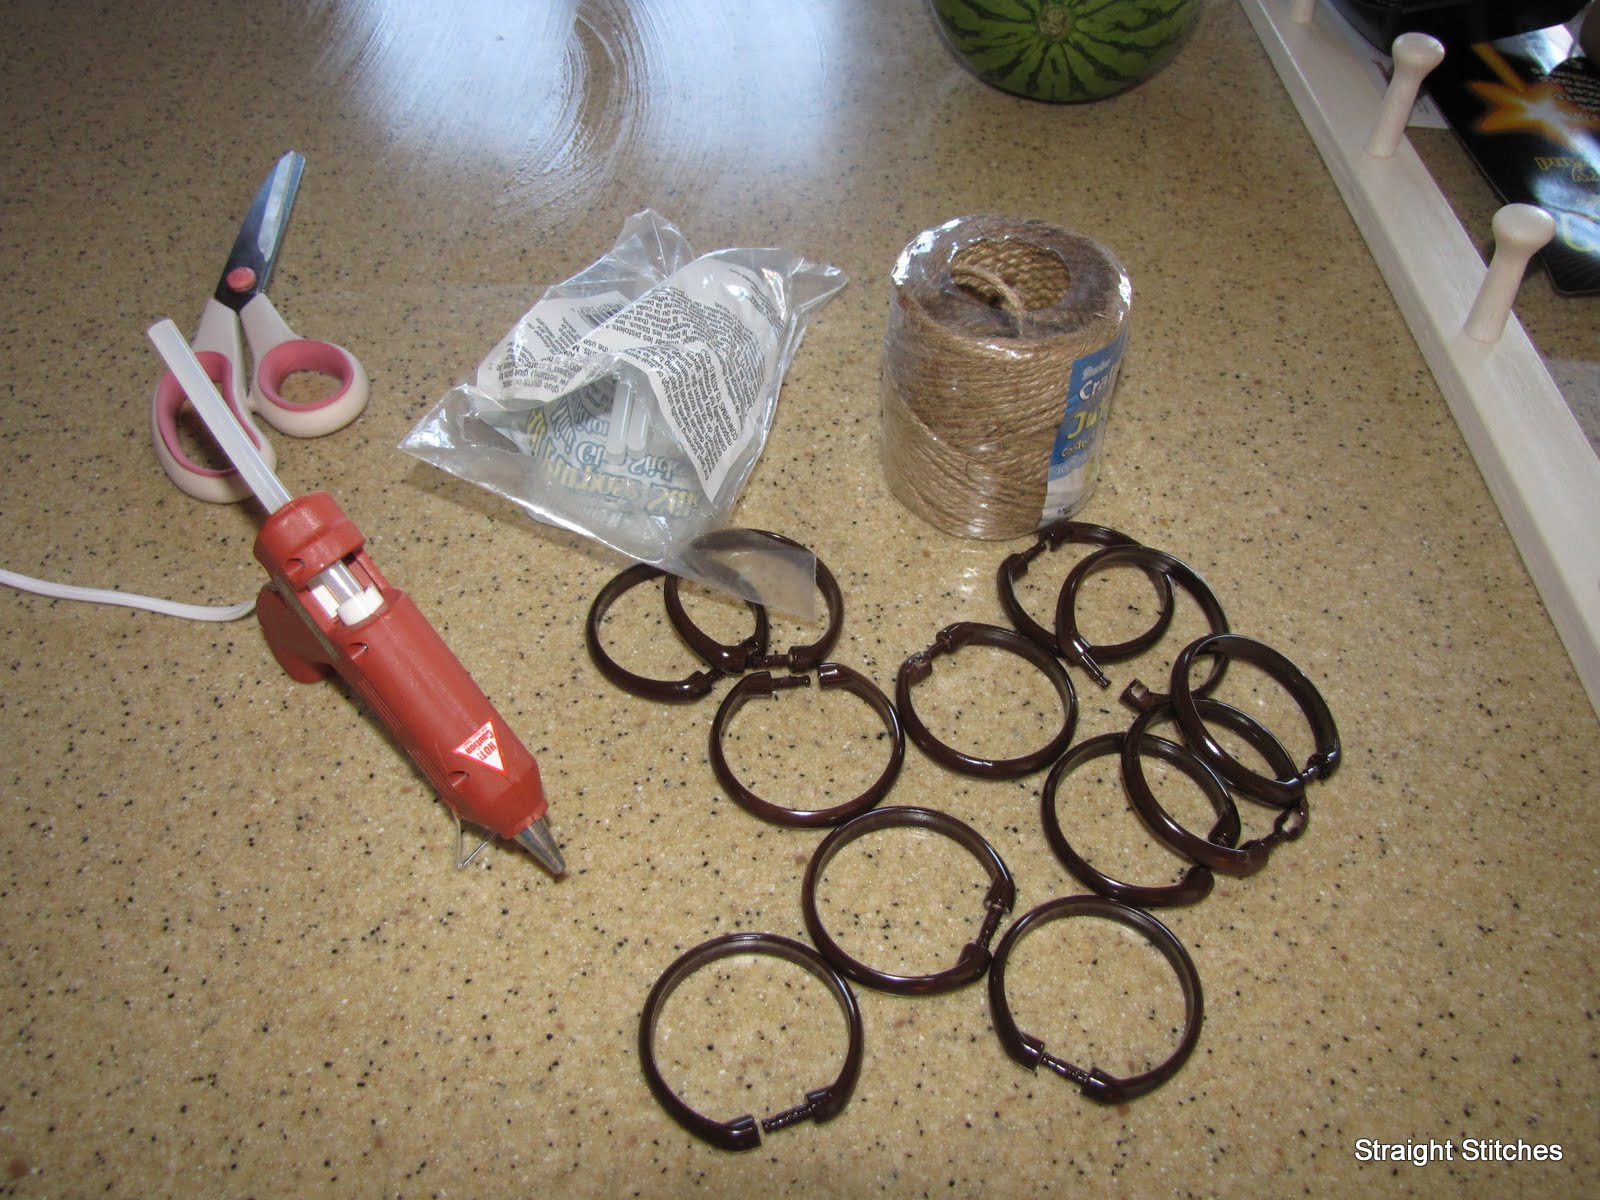
What you'll use


  • Shower Curtain Rings
  • Jute
  • Hot Glue & Gun
  • Spray Paint
  • Scissors


What you'll do


Paint your shower rings. I used brown plastic spray paint (left over from my trash can makeover) and then let it dry a goodly while, and when that didn't make them cure all the way because the humidity this weekend was about elevinty billion I brought them inside, and after 30 minutes they were good to go.

Measure off your jute. I cut three outstretched-arm-to-nose lengths of jute, and on me that would equal 3 yards. 1 yard for each cut. This also equals 4 rings worth of braid.

I tried two different ways of braiding the jute and then attaching it to the rings. The first way was to glue 3 ends of jute down to the shower ring and then braid from there. After I got the thing braided enough to go around it, I ran a bead of glue down the center and pressed the braid down into it. Then I just cut the ends off even with the other end of the ring, making sure to add more glue at the very end so the ends wouldn't fray. This worked fine, but the beginning looked a bit haphazard.


So then the second way was to braid the jute before gluing it down. This worked much better. After braiding a length of it, I just glued it down as previously discussed. Repeat another 11 times. :)


Easy peasy nice and easy. :)


Attach your shower curtain and hang it up with your new lovelies. They look {FAB}ulous in H's bathroom. Don't you think?

Just imagine the possibilities with this though. Instead of braiding you could just wrap them in jute. You could string beads on ribbon, you could braid ribbon, you could....oh you get the idea :)

I hope you gals have enjoyed this and have a marvelous day!
Heather

7/21/2010

Two Baths, Two Themes, A lot of work

7/21/2010 4 Comments
I'm late with this post, because the boys went to bed early and I woke up with some sinus-something-or-other brewing, so its taken me a while to get the gears going, but I'm finally here, with pictures in hand! So without any ado, on to the show!

So I don't know what paint colors I used because they're from the Ooops pile at Lowe's. Can't beat 2 gallons of paint for $5!

Picture Heavy Post Ahead


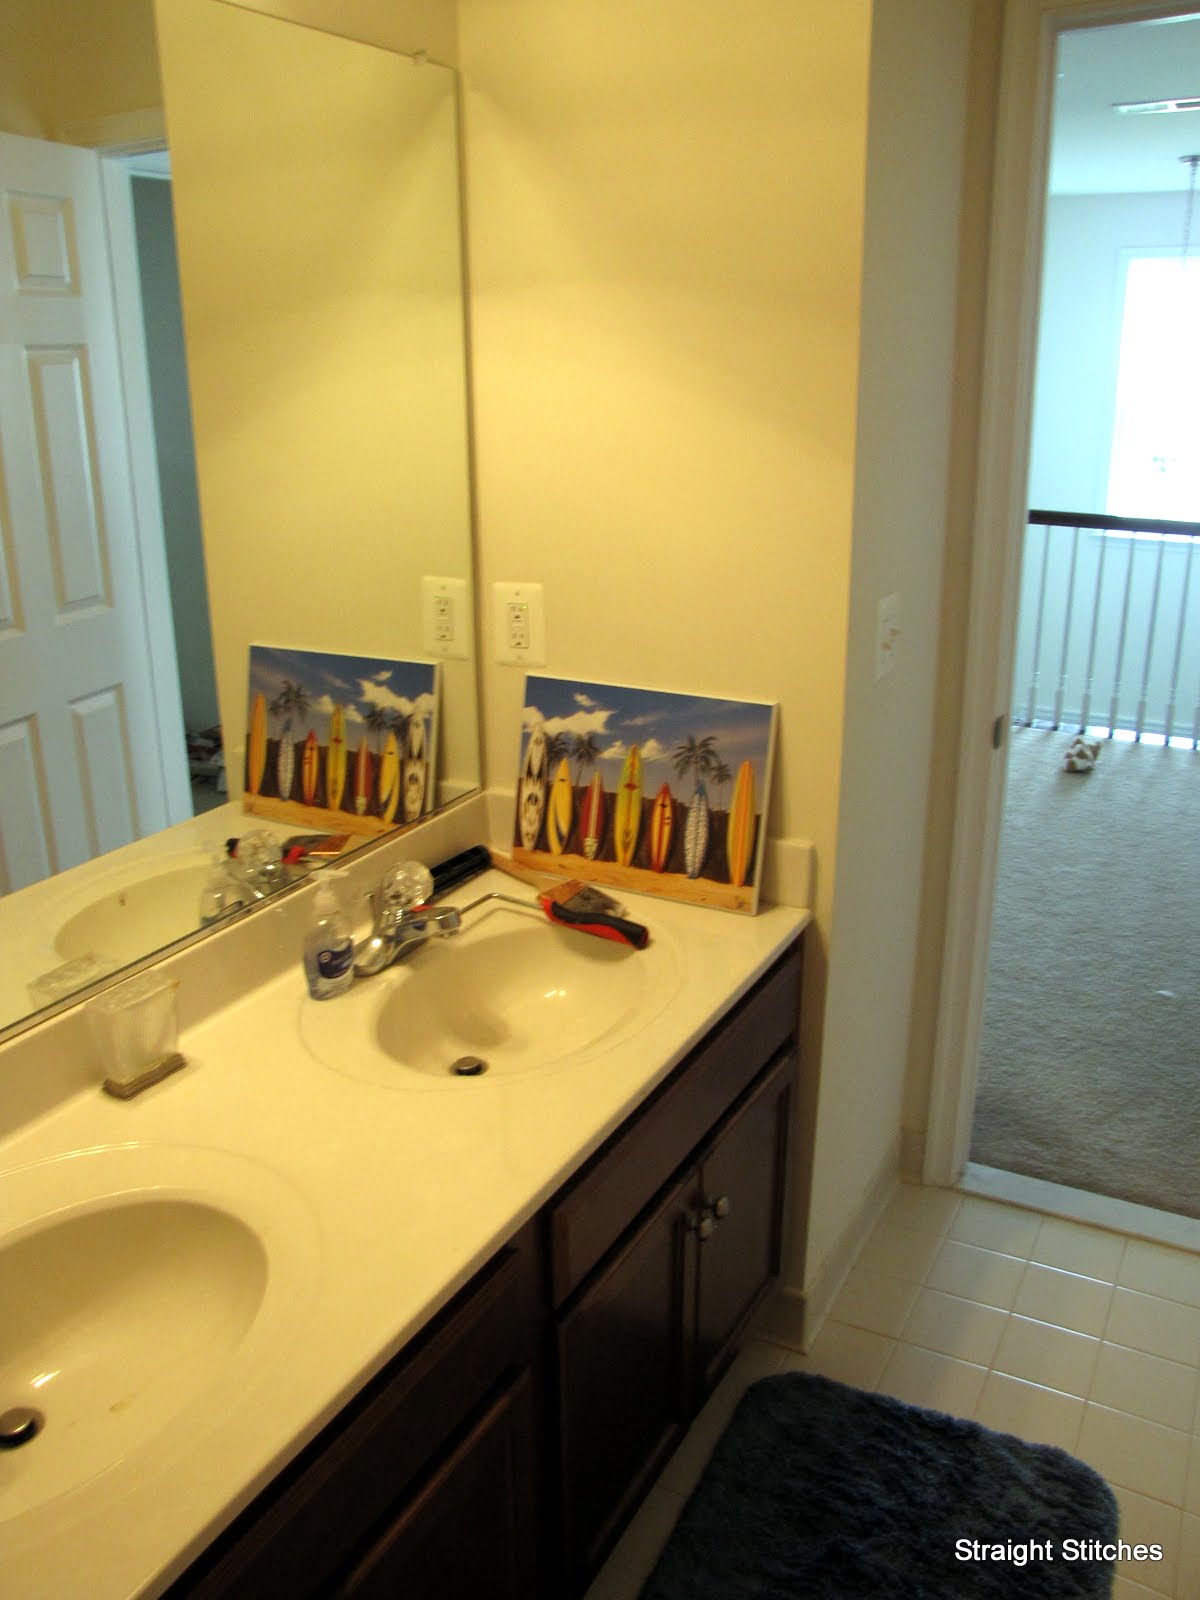
The before:

Harrison's bathroom 


Dev's bathroom

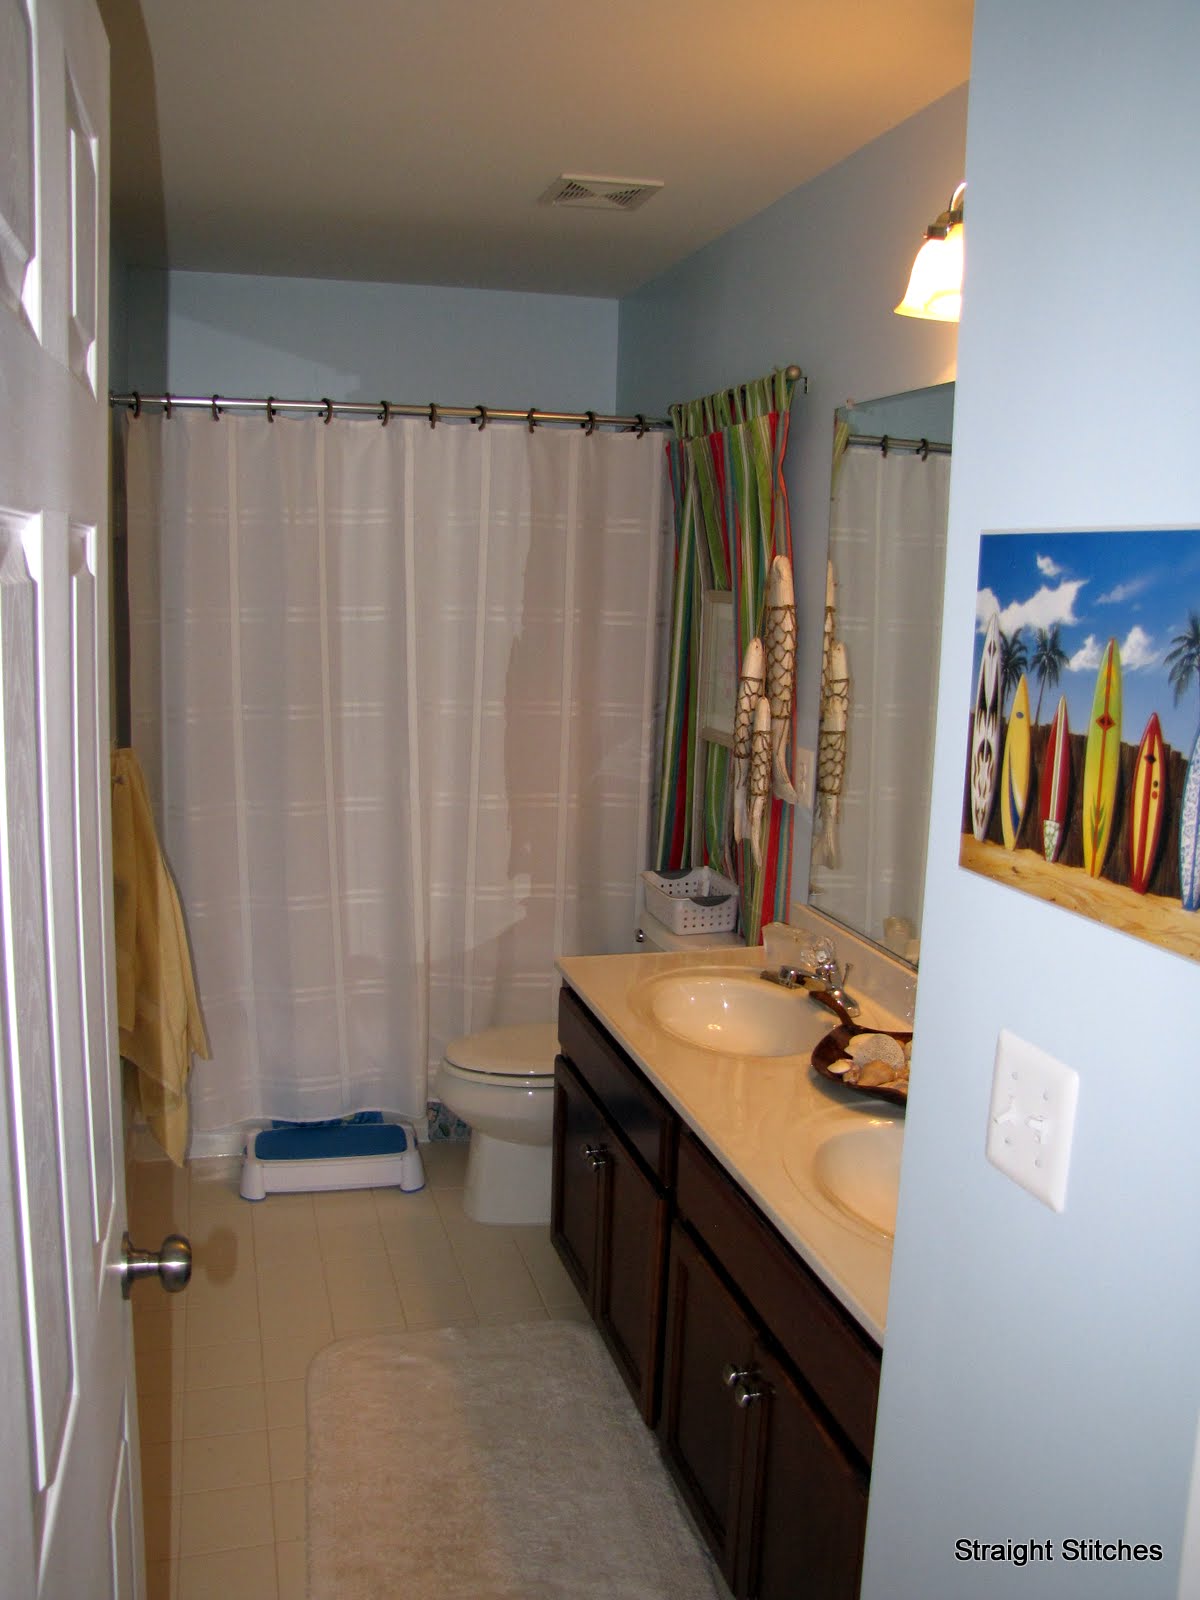
 Here's the view of Harrison's bathroom from the common area. Its very long and somewhat narrow. 

 Sink area. I had wanted to replace that mirror, but I couldn't find anything that I wanted enough to pay for, so I stuck with what I had. I altered the shelf as well so that it would hold some hand towels. 

The curtains had been framing out the tub, but I wanted to keep them, because I love their colors. The seashells were given to me by my grandmother. The platter was $5 from Pier One. :) score! 


A close up of the curtain rings I made. I am loving them! 

The towel bar was replaced for an unfinished number from Lowe's. After painting it, I wrapped it in some sisal rope to give it a little more presence.  

 Here's Dev's bathroom from the doorway. I was able to reuse some of his towels. Don't mind the face paint stain on one of them :) 

 
 His sink and a close-up of the picture that I made him. The picture is from last Halloween. Dev was Woody and Harrison was a mouse. :) 


I hope you gals have enjoyed this little tour. The boys are very happy with their updates. Dev keeps insisting on showing everyone his! Makes a girl feel good when the kids are proud of them. :) 

Have a great day and enjoy it!
Heather

Linking up to:

7/20/2010

Picture Me a Fail

7/20/2010 1 Comments
So when Dev wants us to take his picture he says Picture Me! Well, I'd like to show you some pictures of a fail in Harrison's bathroom. You see, I was going to show you the boys bathrooms today, but I didn't want to do the good news and then end it with the one fail of the project so far, so I will be leading off with the fail and then tomorrow I'll show you the grand finale!  After that I'll also be showing at least one how-to of something I did. :)

Hang on......moving the computer from a small boy that is cruising and thinks my mouse and the mouse transmitterey-thing are his play things.

Ok now that I'm in an unnatural typing position, I can continue. :) Also if anyone knows of a way to get my teething infant to stop trying to use my lower leg as a teething ring, that would be super!  :)

And without further ado.....On with the show!

I have seen modge podge food coloring tints for glass all around blogland recently, and I was so going to do that treatment in Harrison's bathroom, and maybe I should have. If I had, maybe, you'd be seeing the boys bathrooms today. Instead, I fell {more} in love with the milk glass treatment. You know where you paint the inside of the glass and it retains its pretty shiny exterior. Yea, I did that, and screwed it up. Royally. So bad in fact that there was no saving the ship, we had to raze it at sea.
From a distance, they look good. 
Those runs are not at all what I was going for. I used glass enamel paint and I think it was too thick for the method of application. Sigh. Who knew that using gravity to paint something would be so difficult.
So that looks aw.FUL. Into the empties huggies box they go. 
So yesterday afternoon, Dev and I head to Lowe's to pick up some new glass shades for H's light. He picked them out. Aren't they gorgeous? He's got good taste. :)
Sorry about the dark picture....it was about 9:30 last night when this was taken. 
So here's to attempting something new, even though it didn't work. Have a wonderful day and enjoy it!
Heather

7/19/2010

Updating the format...

7/19/2010 2 Comments
Hey all! In case you missed it....there's a new look about the 'ole blog. I have no reason other than I got bored with the other one. :) There are a few bugs....and I don't know how to fix them, because they work on the 'test' blog. The date is off in chrome, but works in IE and in IE the background doesn't like to show up. Go figure. Oh well. I'm still going live with it. :) Oh, just in case you want to see what the date should look like...go here. It's cute, and I miss it, but I don't get why its not working.

I'd love to hear your thoughts on the changes, or if you know how/why my issues are occurring...I'd appreciate all the feedback you can offer. :)

In other news.....the DIY Club voting is up, and the floor candlesticks I made last week are one of the top ten. I wish all the contestants this month luck, and I'm asking that all of you wonderful gals go over and vote for your favorite. Go Vote Here! I'll wait. :)

Ok, glad you're back. I missed you. I really did. :) So we got a LOT of work done this weekend and between Stephen, Evan (our very good friend) and I we're exhausted. Two nights of working till about 3am and then another late night has taken its toll on all of us, but our efforts have been rewarded and I will show all of you our progress throughout the week.

I hope y'all had a wonderful and productive weekend! Have a great day and enjoy it!
Heather

7/16/2010

Is your Fondue cool?

7/16/2010 0 Comments
Photobucket

We're back in action, baby! Yes, folks, that's right. I'm back home in Nashville after my vacation to visit the family and I feel refreshed, rejuvenated, and ready to hit the kitchen again. For this post, I want to share a recipe I tried for the first time while I was chillin' out, maxin', relaxin' all cool...you get the jist...at home.


So the plan was to have a girl's night with chocolate fondue, so I used the BigOven app on my iPhone to find one. Lo and behold, I find a recipe for a cool fondue. Now, I know I live in Tennessee, but I think my beloved Virginia is possibly even more miserable in the summer than it's more Southern neighbor. Why? Humidity! Walking outside in Virginia in the summer is like walking face-first into a damp, hot towel. Ugh! It sucks the life out of you instantly. Needless to say, the idea of a cool fondue was highly attractive to me. Here's the recipe...

Cool Creamy Chocolate Fondue
-3/4 cup semisweet chocolate chips
-1 8oz container Cool Whip thawed
-1/2 tsp ground cinnamon
-1/2 tsp vanilla extract
-Assorted fresh fruit dippers

Place chocolate chips and half of Cool Whip in a small, microwave safe bowl. Microwave uncovered on high for a total of 1 minute, checking and stirring every 20 seconds. Fold in remaining Cool Whip, vanilla, and cinnamon. Stir until smooth. Cover and refrigerate at least 30 minutes.

To serve, spoon fondue into small bowls and serve with fruit dippers.

Here's the almost-stirred fondue. I was tempted to leave it like this because of how cool it looked. By the way, we never did get to have this for a girl's night. We couldn't get everyone together, so I ended up making this for my birthday dinner instead. This is an awesome recipe because you get chocolatey goodness without having to keep it warm. Cool and delicious! Hope you enjoy!


Photobucket

7/15/2010

Giving a previous fail a chance

7/15/2010 3 Comments
So 8 years ago, my husband and I started dating, then after a while we moved in together, and I disliked most of his furniture. So we set about buying new furniture that we both liked. Enter Barewoods Furniture. They had a mission style table set that I liked, and for 4 pieces it was $300 or so. One hitch...they were unfinished. Well even back in the day, I said I can finish it. So I did, and I hated it. Polyshades by Minwax was a new product back then, and between a combination of inexperience, conflicting advice about how stains should be applied and not doing the proper prep work I did not like the finish on the new tables. They only lasted about 8 months until I stripped them down and refinished them. I am proud to say, however; that the tables are still in use with that 2nd refinishing still looking pretty darn good. :)
I know this is an old picture but there are 2 of the tables that I refinished.

So if you visited the link to Barewoods, you'll have noticed that they are closing the Warrenton store, and I just happened to be in Warrenton on Sunday. I was actually looking for a dresser to use as a bar in the basement, but I found these saddle barstools instead and when they start out at $44 and have 25% off....well you just can't get much better than that. $66 out the door with two brand new unfinished barstools is a pretty good deal, IMO. :)  I also found that barbed wire boot at the store...it was $7. :)

As I said yesterday, I had been planning on painting these guys an antique white and then distressing and glazing them. I bought the paint to do so as well, and then I changed my mind. I decided that I would like to tie them into the kitchen table and chairs, which coincidentally are also from Barewoods. We got the table for $100 marked down from $800 at their annual garage sale last year, and it was already finished!

I did not want to spend a lot of time on these stools. I wanted them done, so I went back out and got some Polyshades. I figured I'd give them another shot. They have several shades too choose from. I went with Pecan. It matches the seats on my chairs perfectly. I picked up the satin sheen along with the wood conditioner, and then headed home to start my project.

The barstools came sanded, so I didn't need to do that. I just went ahead and added the wood conditioner per the directions and then did a light sanding after it had dried. Then I added the stain. It went on very nicely. It doesn't say what type of brush to use, but I had some natural bristled chip brushes so that's what I used. The first time I used polyshades, I used a foam brush and the foam started disintegrating, don't do that. I put on two coats, but unfortunately I don't have any pictures between the coats, because I put on the 2nd coat at 1 am this morning, and really I wanted to get it done and then go to bed. :-)
 Sorry for the bad pictures, but the picture on the left is before any work was done, and the picture on the right is after the wood conditioner was put on. 

One of the only irritating parts to the polyshades is that it takes 6 hours of dry time between the coats, and yes, I know that if I had done proper stain and then poly it would take the same amount of total time, but still. I was being impatient. I know you gals are shocked by that statement. ;-) Oh, and watch out for drips. You want to make sure that you put on a very light coat and spread it evenly. You will notice any runs that are left so make sure to get all of them.


Overall, I am quite impressed with the job that the polyshades did, and I will be using it again. What do y'all think? I want to put beadboard around the backside of that island. I am envisioning it being antique white with a mocha glaze. Just another thing on my list along with adding a coffered ceiling to my family room. :) Why do the lists seem to grow?

Have a wonderful day and enjoy!
Heather