Follow Us @SewHalfCrazy

8/31/2010

You have to love....

8/31/2010 12 Comments
The dollar store! I know I do. There are several in an around the area, and its amazing that each one is just a little different from the other.


Restoration Hardware has these:

But at $25 - $79 for them.....um, yea....thats not going to happen in this  house.

So  while out gallivanting one day with my mom, we stopped at the Dollar Store in town.

And from what I picked up there, this was born!


Materials


6 small hurricanes
2 glass candlesticks
4 small glass candlesticks (they came in packages of two)
2 large hurricanes
{optional stuff}
Moss
1/4" oak plywood (we had some leftover from the bar)
Tray (this was on clearance at Pottery Barn for $13!)

What to do


First I soaked all of the glassware. I don't know why they put stickers on this stuff that are not easily pulled off. *sigh*

Then it was time to line it all up, with the Gorilla Glue Epoxy and the Gorilla Tape. I do love me some assembly lines. Unfortunately, this project used up all the rest of my epoxy. :-( I guess I'll just have to go shopping to get some more. :-)

Now just mix up that epoxy, per the directions, and then margarita style, rim each candlestick in the epoxy and then set them on the small hurricanes. Rip a length of of the tape off and use it as a clamp to hold the stick down on the hurricane. We must have lots of pictures for this step......I don't know why.


After the elapsed time, I think 90 minutes, everything is good to go. Pull off the tape and then start using them in your decor!

I had bought a tray from Pottery Barn a few weeks ago on clearance. Its a very lovely open wire work tray, but the glassware would not have set on the bottom of it evenly, so I had the hubs rip down a piece of his leftover oak plywood to fit inside the tray. Then I was good to go to arrange the glassware and place the moss around, I think for Halloween I may get a bunch of small gourds, but you could also do pebbles or anything else you think up!


As you can see I have already used it. I got the candles from the Dollar Store as well. I love the possibilities with this!

I hope you all have a great day and enjoy yourselves!
Heather


Linking up to:


DIY Club ”DIY


Yes....she's back :)


8/30/2010

Git-r-Done!

8/30/2010 8 Comments
Its done and I couldn't be happier about it. The hubs would have been ever so much happier had I gotten it done months ago, but I couldn't decide on those doors. What, you may ask, am I talking about?

Why that blasted red cabinet!

Here she is now!


Here she was then.

Now.

Then.

Ugly and needing some love

Prettified and able to hold her head up high!

So I picked up this little beaut back in April or March and there she sat for a while. Then I pulled out the liquid sander and the vinegar, and boy did those two do a number to her finish.


So after hitting the poor thing with that 1-2 punch, I then started priming her. Red tinted primer is such a lovely shade!


Then  I hit her with a gazillion coats of red paint. Not quite that many, but I did not buy the paint with primer in it and I should have. This shade of red went on fuchsia but dried to this lovely deep red.


An then the poor thing sat. I moved her back into the dining room and filled her up with stuff. Harrison banged stuff all around. The paint took its licks. Chrome spray paint chipped off of some projects and stuck to it. Then I finally decided that I would just make do with the doors that had come with her. I had originally thought of cutting out those louvers but then H went to work and I didn't really want to show off the inside. Maybe one day. After getting everything back together, I decided that some black glaze would do the trick. So I mixed some up  and went to work. And here she is now!


So there she is. Finally done, and looking so fine. :) I'm happy that she's finally done. She's holding napkins and napkin rings, along with some other serving pieces that I don't want seen all the time.
I hope you guys enjoyed! Please remember that tomorrow is the last day to sign up for guest posting here next week. There are still spots open! So go ahead...email me..you know you want to :)

Have a great day and enjoy!
Heather

Linking up to:

8/27/2010

Science Experiments!

8/27/2010 3 Comments
WARNING:
Picture heavy post. Please don all PPE (Personal Protective Equipment)

I confess. Sometimes I get some crazy ideas into my head. My childhood was interesting, especially when I thought I could invent something new. Once I thought I could invent a better alarm clock by hanging up a bag of marbles over my pillow by a string. Needless to say, I've never lacked imagination. This week I had several grand ideas.


The first was a bit like pantry diving, but I didn't have to go that far. I had a bit of leftover peach pie and suddenly wondered this past Sunday morning, "I wonder if I can integrate leftover pie into oatmeal?" Even better, I had some fancy-shmancy cranberry and almond oatmeal to mix it with.


Mmmmm, peaches, oatmeal, pie crust, and milk. What more could you ask for?

Believe it or not, it actually turned out okay! It tasted a lot like muesli or another one of those really expensive granola-type cereals. It probably helps that I really love fruit. I'd take a fruit-based dessert over a chocolate one any day. I'll wait a moment for your shock and horror to subside. Carrying on, if you ever have some leftover pie, this isn't a bad route to take.

My next idea had to do with my most favorite beverage in the whole world: Tea! I really do try to eat healthy when I can, so I felt like a genius when I had this next idea. Here's my ingredient equation...

Cranberry (really healthy, especially for your indoor plumbing)
+
Pomegranates (loads of antioxidants)
=
Ocean Spray Cran-Pomegranate Juice (super healthy!)

Green Tea (scientifically proven to decrease your chance of heart disease)
+
Ocean Spray Cran-Pomegranate Juice
=
You will live forever!!!

Okay, maybe not forever, but it can only improve your chances for immortality. I went half juice and half tea for this concoction and did not add any sugar.


In case you're wondering, yes, I heated it up in the microwave. Blasphemy to most tea traditionalists, but you know what? I'm lazy.

This too turned out quite well. It wasn't as sweet as I usually take my tea, but I was okay with that. Plus, this works because I generally have some trouble with green tea. It tastes a bit like grass. Didn't have any of that with my green-cran-pom brew.

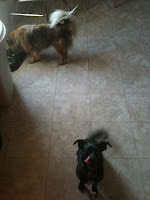
Last, but not least, came the biggest invention of the week. See, I've been planning on making a nice, icy treat for my little fur-babies. They usually stay outside (with lots of fresh water) while we're at work. Badger is black as night and so soaks up heat like nobody's business and Bruin...well, Bruin's just so darn fluffy!


Mummy! Why are we outside? We want to come in!

Frozen dog treats are easy enough to make. Just combine some doggie-safe ingredients (I used vanilla yogurt, peanut butter, and water) and freeze. Freeze? Like in ice cube trays? Yeah, I don't actually own any of those. My house came with a fridge, and my fridge came with an automatic ice maker. And do you know what I found out when I went shopping for an ice cube tray? Those suckers are like $2.50 a pop! Really? For a plastic water mold? We can do better than this. Yes, ladies and possibly gentlemen, I made my own ice cube tray...sort of.

Okay, so this experiment didn't go exactly to plan, but it worked well enough! Follow me.


Here's the hardware. Yes, that's aluminum foil back there.


My kids were very excited about this!


They even helped me clean up the "leftover" peanut butter.


There's the yogurt and peanut butter together. I used one small carton of yogurt and a few healthy spoon fulls of peanut butter. After this, I added a bunch of water.


Then I pulled out a lot of tinfoil to build my tray.


I will not even begin to try and explain how I made this.


I then folded two strips of tinfoil to further separate the "tray" into sections.


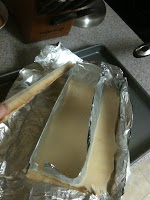
And into the freezer it goes. This looks more like a UFO, but I do recommend constructing your "tray" on the baking sheet. Getting the "tray" onto the sheet with the mixture already in it was challenging, but not impossible.


Tadaa! Frozen puppy treat planks!


And two very happy puppies. :-)

And so ends another exciting week in the world of my culinary experiments. I know some of these things may seem weird, but, like my mum always says, you never know until you try it. So give it a go! And thanks for reading.