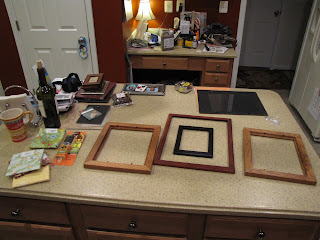
I wanted to incorporate the vintage scissor art that I made a few days ago, and a few weeks ago Shanty 2 Chic posted this tutorial on making your own dry erase board, and I knew I could expand on it. :) Do you see where my ideas start to mesh together? So off to A.C. Moore I go.
What I used:
- 2 - 8x10 frames
- 11x14 frame
- 5x7 frame
- gorilla glue epoxy
- modge podge
- black acrylic paint
- primer
- sanding block
- fabric for 2 frames
- cork board
- clipart
- photo or art
- white glue
- picture hanging hardware, I used 2 saw-tooth hangers.
- Remove the glass and the backing from all the frames. Clean all the glass. Paint all the frames. *I used acrylic paint because is too cold to go out and spray paint, but this would be a lot faster and neater than painting by brush.
- Decide how you want to layout your frames. *If you layer your frames like I did then you want to make sure that the frames that support the other frames are the same height. I used to the same style frames for the 8x10's so it wasn't an issue. If you don't plan on layering your frames, and instead layout the frames so that they are all on the same level then you don't need to worry about the frame depth.
- After you decide how want your frames laid out; attach the picture hanging hardware. *I did not do this until I finished the piece and that's when I realized I should have done it before attaching all the frames together. I added two hangers to the very top frame.
- Gently sand where the frames meet so that the epoxy has something more to grab. Mix up the epoxy per the directions and then apply the epoxy to where you sanded. Make sure to cover everywhere that will overlap.
- Sandwich the frames together and then clamp together to ensure a good bond. Let dry. *I did not have a good bond on one of my frames and then I accidentally hit the frame while taking it upstairs to hang it and the frame fell off....I re-epoxied it and now it's all good...I even did another hit test. :)
- While the epoxy is drying, measure and cut your fabric to the frame. I added fabric to the 5x7 frame and one of the 8x10 frames. I laid the backing on the fabric then added about 3/4" to each edge. I then added a line of glue to the backing and wrapped the fabric around.
- Print out your clip art and cut out. I left a small bit of white to outline my image. Turn the image over and paint the entire back of the image with modge podge. *I trimmed the bottom of my clip art so that it would have a flat edge against the frame/bottom of the glass. I did not feel like removing the glass after I put the frame together.
- Adhere the clip art, image side up directly to the outside of the glass.
- Cut your corkboard to fit your frame then adhere to the backing of the frame. Sandwich the cork between two books or between to layers of glass and then add weights to ensure that the cork does not bubble.
- Remove the clamps and weights from your frames. Lay your art and corkboard into their respective frames then secure. Assemble the remaining frames as would for a normal picture.
- Take your sanding block and distress some of the edges of your creation. Hang and enjoy your new art/message center. :)
This is why you should always check where your picture should go before putting in the nail....it's fixed now and clears the light switch :)
I'm linking up to:


What a lovely project! I love your twist on pics and bulletin board all in one area. Very pretty!
ReplyDeleteDonna
http://funkyjunkinteriors.blogspot.com/
That is really cool!! I love how interesting those pictures are.
ReplyDeleteThis came out so lovely! I really love the items you picked to frame.
ReplyDeleteFabulous!! It looks so great all together! I'm so glad you posted the finished product today for "Brag Monday" so we could all enjoy your lovely project.
ReplyDeleteLove this idea!
ReplyDeleteGreat job!
Love the way you incorporated the scissor graphics! I have been tossing all the sewing themed items around in my head trying to come up with something that will use them all.
ReplyDeleteVery creative idea, I love it! Thanks for sharing!
ReplyDeleteWhat a great idea! Thanks for sharing.
ReplyDeleteThis looks fabulous...you did a great job!
ReplyDeleteWow, that's pretty cool. I never would have thought of that. I love it. You did a great job!
ReplyDeleteI would never have thought to put frames together like that. Such a fun idea. Very functional and cool looking!
ReplyDeleteI love this idea for so many reasons - I used to be a clothing designer and have a soft spot for anything dressmaker related. It is beautiful.
ReplyDeleteHolly
504main.blogspot.com
Love this idea - it looks like what I've been imagining over my craft desk! Good inspiration - now I'll get going on it!
ReplyDeleteI love your collage! Especially those scissors...too cute. Thanks for linking up to my party.
ReplyDelete